How to Choose the Right Car Lift for Your Garage
Choosing the right car lift is one of the biggest investments you can make for your home garage. This comprehensive guide walks you through every factor you need to consider, from ceiling height and floor thickness to weight capacity and electrical requirements.
Affiliate Disclosure: Car Lift For Garage is a participant in the Amazon Services LLC Associates Program, an affiliate advertising program designed to provide a means for sites to earn advertising fees by advertising and linking to Amazon.com. We may earn a commission from qualifying purchases made through links on this page, at no additional cost to you.

Step 1: Assess Your Garage Space
Before you even begin browsing car lifts, the single most critical step is to measure your garage thoroughly. I have seen dozens of enthusiasts purchase a lift only to discover it does not fit their space, and returns on heavy equipment are expensive and frustrating. Let me walk you through exactly what you need to measure and why each dimension matters.
Start with your ceiling height. For a standard two-post lift, you need a minimum ceiling clearance of 11 feet 6 inches to comfortably raise a sedan to full working height. If your garage has a ceiling height of 10 feet or less, you are looking at either a low-profile two-post model, a four-post surface-mounted lift, or a portable lift like the QuickJack.
💡Measure to the Lowest Obstruction
Always measure from the finished floor to the lowest obstruction on the ceiling, which is often a garage door track, light fixture, or ceiling joist rather than the drywall surface itself. This ensures you account for all clearance limitations.
Next, measure the width between your walls or any permanent obstructions. A two-post lift typically requires a bay width of at least 12 feet to allow comfortable door opening and walk-around space on both sides of the vehicle. Four-post lifts are slightly wider in their overall footprint but can be more forgiving in narrow spaces because the vehicle drives straight on without needing extra room for swing arms.
Floor space is the third dimension to check. The distance from the front of your garage to the back wall matters because most lifts need a minimum approach depth of 24 feet when you factor in the length of the vehicle plus the space behind it for the lift columns or ramps. If your garage is shorter than 24 feet, a mid-rise scissor lift or a portable unit may be the better option.
Finally, take a close look at your garage door. When a car is raised on a full-height lift, you still need to be able to open and close the garage door without interference. Many homeowners forget to account for the door track and opener mechanism that hangs down several inches from the ceiling. I recommend having at least 6 inches of clearance between the highest point of your raised vehicle and the lowest point of the garage door hardware.
Do not forget about column placement relative to your garage door opening. Some two-post lifts, when installed close to the door, can interfere with the door tracks. I always advise drawing a simple floor plan on graph paper with all obstructions marked before making a purchase decision.
Step 2: Understanding the Types of Car Lifts
There are several distinct categories of car lifts, and each one is designed for different use cases, budgets, and garage configurations. In my 20 years as an ASE-certified technician, I have worked with every type, and I can tell you that choosing the wrong category is the most common and costly mistake people make.
| Lift Type | Capacity Range | Ceiling Height | Price Range | Best For |
|---|---|---|---|---|
| 2-Post Lifts | 9,000-12,000 lbs | 11'6" minimum | $2,000-$5,000 | Full mechanical access, professional repairs |
| 4-Post Lifts | 8,000-14,000 lbs | 8'-10' | $2,500-$6,000 | Vehicle storage, easy drive-on operation |
| Scissor Lifts | 6,000-8,000 lbs | 8'-9' | $1,500-$3,500 | Mid-rise access, low ceiling garages |
| Portable Lifts | 5,000-7,000 lbs | 8' standard | $1,200-$2,000 | Space efficiency, occasional use |
Two-post lifts are the gold standard for professional-grade vehicle access. They lift the car by its frame or designated lift points using a pair of vertical columns connected by a cross-beam or base plate. The primary advantage is unrestricted access to the entire underside of the vehicle, including the wheels, suspension, brakes, and exhaust. This makes them ideal for anyone who plans to do serious mechanical work. The BendPak XPR-10AS is a top choice in this category, offering 10,000 pounds of lifting capacity with asymmetric arm design for easier door clearance. However, two-post lifts require anchoring into concrete that is at least 4 inches thick, and they typically need a 220-volt power supply.
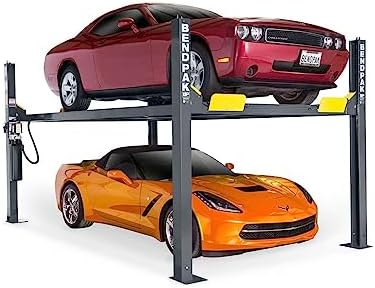
Four-post lifts use a drive-on ramp design supported by four vertical columns. They are the most popular choice for home garages because they are easier to install, do not require floor anchoring in most cases, and double as vehicle storage platforms. You can park one car on the lift and another underneath, effectively doubling your garage capacity. The trade-off is that the wheels remain on the ramps, so you do not get direct access to brakes, tires, or suspension components without adding optional rolling jacks. The BendPak HD-9 is a standout model in this class with 9,000 pounds of capacity.
Scissor lifts sit low to the ground and use a crisscrossing mechanism to raise the vehicle. They are a popular mid-rise option, typically lifting vehicles 3 to 4 feet off the ground. While they do not provide the full overhead access of a two-post lift, they are excellent for oil changes, exhaust work, and undercarriage inspections. Their compact folded profile makes them ideal for garages with low ceilings or limited space.
Portable lifts, like the QuickJack 5000TL, are frame-mounted hydraulic units that sit flat on the floor when not in use. They are the most space-efficient option and can be moved or stored away when you need your garage floor back. They typically lift vehicles 2 to 3 feet and are best suited for hobbyists who need occasional access to the undercarriage.
Parking lifts are specialized four-post designs optimized for vehicle storage rather than maintenance. They are engineered to safely hold a vehicle overhead for extended periods, allowing you to park a second vehicle underneath. If your primary goal is space rather than wrenching, a parking lift might be the most practical choice for your situation.
Step 3: Weight Capacity Guidelines
Choosing the correct weight capacity is not simply about matching the lift rating to your vehicle's curb weight. There is more nuance to it, and getting this wrong can be genuinely dangerous. As someone who has inspected lift installations for over two decades, I want to make sure you understand exactly how capacity ratings work and how to select the right one.
Every car lift has a rated capacity, which is the maximum weight it can safely lift and hold. This number is determined through engineering tests and, for ALI-certified lifts, verified by an independent testing lab. Common residential lift capacities range from 5,000 pounds for portable units up to 14,000 pounds for heavy-duty four-post models. The most popular capacity for home garages is 9,000 to 10,000 pounds, which handles the vast majority of passenger vehicles, light trucks, and SUVs.
⚠️Don't Buy Too Close to Maximum Capacity
Always purchase a lift with at least 20 percent more capacity than your heaviest vehicle's GVWR. This safety margin accounts for cargo, accessories, tools, and dynamic loading forces during operation.
Here is where many buyers get tripped up: you need to account for more than just the vehicle's weight. Consider the weight of any cargo, accessories, and aftermarket parts. A stock Ford F-150 weighs around 5,000 pounds, but add a toolbox, a bed cap, aftermarket bumpers, and a winch, and you can easily be looking at 6,000 to 6,500 pounds. If you are working on the vehicle, tools, fluids, and parts placed on or in the vehicle add weight too.
I always recommend buying a lift with at least 20 percent more capacity than your heaviest vehicle's gross vehicle weight rating (GVWR). The GVWR, which is printed on a placard inside the driver's door jamb, represents the maximum total weight the vehicle can carry including passengers and cargo. This is a better reference point than curb weight because it accounts for a fully loaded scenario.
Recommended minimum capacities by vehicle type:
- Compact cars and mid-size sedans: 7,000-pound lift minimum
- Full-size sedans, small SUVs, crossovers: 9,000-pound lift minimum
- Full-size trucks, large SUVs, vans: 10,000-pound lift minimum
- Heavy-duty trucks, diesel pickups, commercial vehicles: 12,000-14,000-pound lift minimum
Do not forget that capacity ratings can vary depending on arm position. Some two-post lifts have a lower rated capacity when the arms are in the asymmetric position compared to the symmetric position. Always check the manufacturer's specifications for both configurations. The BendPak XPR-10AS, for example, maintains its full 10,000-pound rating in both symmetric and asymmetric configurations, which is one reason I recommend it so highly.
Step 4: Power and Electrical Requirements
The electrical requirements of your car lift can be a deal-breaker if your garage is not properly wired, so let me break down exactly what you need to plan for. I have seen too many projects stall because the buyer did not budget for or anticipate the electrical work that a lift installation requires.
Most full-size two-post and four-post car lifts operate on 220-volt single-phase power, which is the same type of circuit that powers an electric dryer or large welder. The typical power unit on a 9,000 to 10,000-pound lift draws between 20 and 30 amps during operation. This means you will need a dedicated 30-amp, 220-volt circuit run from your main electrical panel to the lift location. If your panel does not have room for an additional 220-volt breaker, you may need a sub-panel installed, which adds to the project cost.
Some lighter-duty lifts and most portable lifts operate on standard 110-volt household current. The QuickJack 5000TL, for example, uses a 110-volt power supply that plugs into a standard outlet. This is a significant advantage for garages where running a new 220-volt circuit would be difficult or expensive. However, 110-volt lifts generally have slower lift speeds and lower maximum capacities.
The distance from your electrical panel to the lift location matters because of voltage drop. For runs longer than 50 feet on a 220-volt circuit, you may need to upsize the wire gauge from the standard 10-gauge to 8-gauge to ensure the motor receives adequate voltage. Undersized wiring can cause the motor to overheat, trip breakers, or fail prematurely. This is not something to guess at. Hire a licensed electrician to evaluate your specific situation.
I also recommend installing a disconnect switch within sight of the lift. This is actually required by the National Electrical Code for motor-driven equipment and provides an important safety feature. If something goes wrong while you are under the vehicle, anyone can quickly cut power at the disconnect without having to find the breaker panel.
Ground Fault Circuit Interrupter (GFCI) protection is another consideration. While not always required by code for 220-volt circuits in a garage, many local jurisdictions do require GFCI protection for all garage outlets. Check with your local building department. If GFCI is required, make sure you use a GFCI breaker rated for motor loads to avoid nuisance tripping.
Budget between $300 and $800 for the electrical work, depending on how far the circuit needs to run and whether your panel has capacity. Get quotes from at least two licensed electricians before committing.
Step 5: Installation Considerations
Installing a car lift is not a casual weekend project. It requires careful planning, the right tools, and in most cases professional help. I am going to walk you through the key installation factors so you can plan properly and avoid costly mistakes.
The most critical installation requirement is your garage floor. For any bolt-down lift, including all two-post lifts and many four-post lifts, the concrete slab must be at least 4 inches thick and have a minimum compressive strength of 3,000 PSI. If your slab is thinner or you are unsure of its thickness, you can hire a concrete testing company to core a small sample and measure it. The cost is typically $150 to $300 and it is money well spent. Installing a lift on inadequate concrete can result in anchor pullout, which is a catastrophic and potentially fatal failure.
Anchor bolts are the next consideration. Most lift manufacturers specify either wedge anchors or sleeve anchors, and they will typically include the required anchors with the lift. The anchor holes must be drilled precisely according to the template provided, and the bolts must be torqued to the manufacturer's specification. I have seen installations where the installer used the wrong type of anchor or did not torque them properly, and it compromises the entire system.
For four-post lifts that are not bolted down, floor levelness becomes extremely important. The ramps need to sit flat and level for the locking mechanisms to engage properly. If your garage floor has a slope of more than 1 inch over the length of the lift, you will need shims or a leveling system. Most four-post lift manufacturers include leveling feet or recommend specific approaches for sloped floors.
The physical installation process for a two-post lift typically takes a professional crew 4 to 6 hours. The lift components are heavy, with individual columns weighing 300 to 500 pounds, so you need at minimum a heavy-duty engine hoist or a forklift for positioning. Some manufacturers offer installation services or can connect you with certified installers in your area, and I strongly recommend using them. Professional installation typically costs $500 to $1,000 depending on your location and the complexity of the job.
Permits and inspections are something many home garage owners overlook. Depending on your municipality, you may need a building permit for a car lift installation, especially if it involves electrical work or structural modifications. Some areas also require periodic inspections of lift equipment. Check with your local building department before starting the project. The permit cost is usually minimal, between $50 and $200, and having the installation inspected provides valuable peace of mind.
Finally, consider access for delivery. A typical two-post lift ships on a pallet that weighs over 1,000 pounds and measures roughly 4 feet by 4 feet by 8 feet. Make sure the delivery truck can reach your driveway and that you have a way to move the pallet from the truck to your garage. Many freight carriers offer lift-gate service for an additional fee.
Step 6: Budget Ranges and Getting the Best Value
Let me give you a realistic breakdown of what you should expect to spend on a car lift, including the expenses that many buyers forget to budget for. In my experience, the total installed cost is typically 30 to 50 percent more than the sticker price of the lift itself, and knowing this upfront will help you make a smarter decision.
| Price Tier | Lift Type | Unit Cost | Total Installed | Best For |
|---|---|---|---|---|
| Budget | Portable (QuickJack 5000TL) | $1,500 | $1,500-$1,600 | Hobbyists, occasional use |
| Mid-Range | 2-Post (APlusLift HW-9KOH) | $2,195 | $3,050-$5,700 | Home mechanics, regular use |
| Premium | 2-Post (BendPak XPR-10AS) | $4,035 | $4,885-$6,035 | Serious enthusiasts, long-term investment |
| Storage | 4-Post (BendPak HD-9) | $3,570 | $4,170-$5,570 | Dual-purpose storage and maintenance |
Portable lifts represent the most affordable entry point. The QuickJack 5000TL comes in around $1,500, and because it runs on 110-volt power and does not require floor anchoring, your installation costs are essentially zero. This makes the total project cost under $1,600 in most cases. Portable lifts are ideal for hobbyists who want occasional access to the undercarriage without dedicating permanent garage space to a lift.
Mid-range two-post lifts fall in the $2,000 to $3,500 range for the unit. The APlusLift HW-9KOH at $2,195 is an excellent value in this tier, offering 9,000 pounds of overhead-style capacity at a competitive price. Add $300 to $800 for electrical work, $500 to $1,000 for professional installation, and another $50 to $200 for permits, and your total project cost lands between $3,050 and $5,700. This tier is where I see the best balance of capability and cost for serious home mechanics.
Premium two-post lifts like the BendPak XPR-10AS run around $4,035 for the unit. BendPak commands a higher price because of their superior build quality, ALI certification, and excellent customer support. With installation costs, you are looking at a total project budget of $4,885 to $6,035. If you plan to use your lift regularly for 10 or more years, the premium investment pays for itself in reliability and resale value.
Four-post lifts range from about $2,500 for basic models to $5,700 or more for heavy-duty units like the BendPak HDS-14. The advantage of many four-post lifts is simpler installation since they often do not require floor anchoring, which can save you $500 to $1,000 in installation costs. The BendPak HD-9 at $3,570 is a strong mid-range choice in the four-post category.
Here is what many people forget to include in their budget: concrete repair or reinforcement if your slab is inadequate (can run $1,000 to $3,000), upgraded lighting for the work area under the lift ($100 to $500), drip trays and floor mats ($50 to $200), and basic lift accessories like jack stands and wheel chocks ($100 to $300).
My advice is to buy the best lift you can reasonably afford. A quality lift from a reputable manufacturer like BendPak, Challenger, or Rotary will last 20 to 30 years with proper maintenance, making the per-year cost remarkably low. Cheap lifts from unknown manufacturers may save you money up front, but they often lack proper safety certifications, use inferior hydraulic components, and have little to no manufacturer support when something goes wrong.
Step 7: Making Your Final Decision
Now that you understand the key factors, let me help you synthesize everything into a clear decision framework. After helping hundreds of customers choose lifts over my career, I have found that most buyers fall into one of four profiles, and matching your profile to the right lift type simplifies the decision enormously.
Profile 1: The Weekend Hobbyist. You change your own oil, rotate tires, and occasionally tackle brake jobs or exhaust work. You do not want a permanent installation and you need your garage floor back when you are not wrenching. Your best option is a portable lift like the QuickJack 5000TL. It stores flat, runs on 110-volt power, and provides enough lift height for most common maintenance tasks. Budget around $1,500 to $2,000.
Profile 2: The Dedicated Home Mechanic. You do all your own maintenance and take on larger projects like suspension rebuilds, engine swaps, or restoration work. You want full access to the undercarriage and you are willing to dedicate permanent garage space. A two-post lift is your best choice. The asymmetric design of the BendPak XPR-10AS gives you excellent vehicle access with door clearance for getting in and out during the work. Budget $3,000 to $6,000 installed.
Profile 3: The Space Maximizer. Your primary goal is doubling your parking capacity, with the ability to do occasional maintenance as a secondary benefit. A four-post lift like the BendPak HD-9 is exactly what you need. You can park one car on the lift and another underneath, and when you want to do maintenance, you can add optional rolling jacks for wheel-off access. Budget $3,000 to $5,500 installed.
Profile 4: The Professional or Semi-Pro. You run a side business or work on cars for friends and family regularly. You need the fastest cycle times, heaviest capacity, and most durable components. Look at commercial-grade two-post lifts with 10,000 to 12,000 pounds of capacity and features like automatic arm restraints and dual-point safety locks. Budget $4,500 to $8,000 installed.
Regardless of which profile fits you, there are three non-negotiable criteria I insist on. First, buy a lift with ALI certification or ETL testing, which confirms it meets the safety standards set by the Automotive Lift Institute. Second, choose a manufacturer with a strong warranty, at minimum 3 years on structural components and 1 year on the power unit. Third, invest in professional installation unless the manufacturer specifically states the lift is designed for owner installation.
Once you have narrowed your choice to a specific lift, call the manufacturer's customer support line and ask about your garage dimensions, floor specifications, and electrical setup. A reputable company will help you verify that their lift will work in your space before you buy. This one phone call can save you thousands of dollars and weeks of frustration.
Take the time to get this decision right. A car lift is a 20-year investment that will transform how you work on vehicles. Choose wisely, install safely, and enjoy the incredible convenience of having professional-grade vehicle access in your own garage.
Our Top Recommendations
BendPak XPR-10AS
Best overall two-post lift for home garages. The asymmetric arm design provides excellent door clearance, and the 10,000-pound capacity handles everything from compact cars to full-size trucks. ALI-certified with a rock-solid warranty.
BendPak HD-9
Top four-post choice for dual-purpose storage and maintenance. The 9,000-pound capacity fits most vehicles, and the drive-on design makes it easy to use without a spotter. No floor anchoring required in most installations.

QuickJack 5000TL
Best portable lift for hobbyists and space-constrained garages. Runs on standard 110-volt power, stores flat on the floor, and lifts up to 5,000 pounds. Perfect for oil changes, brake work, and exhaust repairs without a permanent installation.

APlusLift HW-9KOH
Outstanding value in the two-post category. At $2,195 for a 9,000-pound overhead two-post lift, it delivers serious capability at a mid-range price. Great option for home mechanics who want professional access without the premium price tag.
* Affiliate link - we may earn a commission
Frequently Asked Questions
What ceiling height do I need for a car lift in my garage?▼
How thick does my garage floor need to be for a car lift?▼
Can I install a car lift myself or do I need a professional?▼
What is the best car lift for a two-car garage?▼
How much does it cost to install a car lift in a home garage?▼
Do I need a permit to install a car lift in my garage?▼
About the Author

James Wilson
- ASE Master Automobile Technician (A1–A9)
- Automotive Lift Institute (ALI) Lift Inspector Certified
- 20+ years in professional automotive service
ASE-Certified Master Technician and editorial lead at Car Lift For Garage. 20+ years servicing and installing automotive lifts across residential and light-commercial shops.
Related Expert Reviews
More Buying Guides
Car Lift Safety Features You Cannot Ignore
A car lift holds thousands of pounds directly above you while you work. Understanding the safety features that protect you is not optional. This guide covers every critical safety system you should demand in a car lift purchase.
11 min read · By Mike Rodriguez4-Post LiftsBest 4-Post Car Lift for Home Garage (2026): 9 Tested & Ranked
After testing nine four-post car lifts in home garage conditions, we ranked them by build quality, safety certifications, ease of installation, and value. Whether you need a lift for storage, maintenance, or both, this guide tells you exactly which model to buy.
14 min read · By James WilsonComparison4-Post vs 2-Post Car Lifts: Which Is Right for Your Garage?
Choosing between a 4-post and 2-post car lift is the most common decision home garage owners face. This head-to-head comparison covers everything from installation requirements to long-term value so you can pick the right lift type for your needs.
10 min read · By James Wilson4-Post LiftsBest Storage Lifts for Garages — Double Your Parking Space
Need more garage space? A storage lift lets you park two vehicles in one bay. We compare the best storage lifts for home garages including 4-post drive-on lifts and dedicated parking lifts, with real pricing and installation requirements.
8 min read · By James WilsonReady to Find Your Lift?
Browse our curated selection of top-rated car lifts or use our comparison tool to find the perfect match.