Car Lift Installation Guide: Step-by-Step for Home Garages
Installing a car lift is one of the most significant upgrades you can make to your home garage, but it requires careful planning and proper execution. This guide walks you through every step of the installation process to ensure your lift is safe, functional, and properly installed.
Affiliate Disclosure: Car Lift For Garage is a participant in the Amazon Services LLC Associates Program, an affiliate advertising program designed to provide a means for sites to earn advertising fees by advertising and linking to Amazon.com. We may earn a commission from qualifying purchases made through links on this page, at no additional cost to you.

Pre-Installation Assessment: Critical Checks Before You Start
Before you unpack a single box or drill a single hole, you need to conduct a thorough pre-installation assessment of your garage. This evaluation will determine whether your space is suitable for a lift, what modifications might be needed, and whether you should proceed with professional installation or attempt a DIY approach.
Concrete Floor Evaluation
Your garage floor is the foundation of your entire lift installation. For bolt-down lifts (all two-post lifts and some four-post lifts), the concrete must meet strict specifications:
- Minimum thickness: 4 inches
- Minimum compressive strength: 3,000 PSI
- No major cracks in the anchor zones
- No embedded radiant heating, plumbing, or post-tension cables
⚠️Verify Your Concrete Thickness
Never assume your slab meets requirements. Older homes, garage additions, and unpermitted conversions often have substandard concrete. Hire a concrete testing company to core your slab ($150-$300) or measure at visible edges. Installing a lift on inadequate concrete can result in catastrophic anchor pullout.
If you don't know your slab's age or specifications, hire a concrete testing company to extract a core sample. They'll measure thickness, test compressive strength, and provide a written report. This costs $150 to $300 and is money well spent compared to the risk of anchor failure.
Ceiling Height Requirements
| Lift Type | Minimum Ceiling Height | Comfortable Height |
|---|---|---|
| 2-Post (standard) | 11 feet 6 inches | 12 feet |
| 2-Post (low-profile) | 10 feet | 10 feet 6 inches |
| 4-Post | 8-10 feet (depends on vehicle) | 10-11 feet |
| Scissor Lift | 8-9 feet | 9-10 feet |
| Portable Lift | 8 feet | No restriction |
Measure from your finished floor to the LOWEST obstruction on your ceiling. This is usually the garage door track, opener mechanism, or light fixtures rather than the drywall itself.
Electrical Service Assessment
Most full-size lifts require 220-volt, 20-30 amp service. Open your electrical panel and verify:
- Available breaker spaces for a 220V double-pole breaker
- Total panel capacity (is there room for another major circuit?)
- Distance from panel to lift location (affects wire gauge)
- Current garage outlets and circuits
If your panel is full or you're not sure about capacity, have a licensed electrician evaluate before purchasing a lift. Adding a sub-panel can cost $500-$1,200.
Space Requirements
- Two-post lifts: 12+ feet bay width, 24+ feet depth for comfortable vehicle and column placement
- Four-post lifts: 9+ feet width, 20+ feet depth
- Door clearance: Minimum 6 inches between raised vehicle and garage door track
- Walk-around space: 3+ feet on at least two sides of the vehicle
Permit Research
Contact your local building department before purchasing. Many jurisdictions require:
- Building permit for lift installation ($50-$200)
- Electrical permit for new 220V circuit ($30-$100)
- Inspection after installation
- Annual inspections in some areas
Skipping permits can create liability issues, code violations, and problems when selling your home. Always pull proper permits.
Professional vs. DIY Decision
Consider professional installation if:
- You've never worked with heavy equipment (columns weigh 300-500 lbs each)
- Your concrete needs verification or reinforcement
- Your electrical service needs upgrading
- You're uncomfortable with precision drilling and anchor installation
- You want warranty protection (many manufacturers require professional installation)
DIY installation may be feasible for:
- Four-post freestanding lifts with clear instructions
- Portable lifts (QuickJack style) designed for owner installation
- If you have mechanical experience and proper equipment
- If you have at least one strong helper
For two-post lifts, I strongly recommend professional installation for safety and liability reasons.
Tools and Materials You'll Need
Having the right tools and materials ready before you start will make your installation go smoothly and help you avoid dangerous shortcuts. Here's the comprehensive list based on 18 years of lift installations.
Essential Tools for Two-Post Lift Installation:
| Tool | Purpose | Notes |
|---|---|---|
| Rotary hammer drill | Drilling anchor holes in concrete | Must use, not regular drill |
| 5/8" or 3/4" masonry bit | Anchor hole drilling | Size per manufacturer spec |
| Rebar locator | Finding embedded steel | Prevents hitting rebar |
| Laser level | Column alignment | Critical for safe operation |
| Torque wrench (0-150 ft-lbs) | Anchor bolt installation | Proper torque essential |
| Engine hoist or forklift | Lifting columns into position | Columns weigh 300-500 lbs |
| Socket set (SAE and metric) | Assembly | Full range needed |
| Impact driver | Assembly bolts | Speeds installation |
| Measuring tape (25+ feet) | Layout and verification | Multiple measurements |
| Chalk line | Marking floor layout | Anchor hole locations |
| Shop vacuum | Cleaning anchor holes | Critical for anchor strength |
| Wire brush | Cleaning anchor holes | Removes concrete dust |
For Four-Post Lift Installation:
- Socket set and wrenches for assembly
- Level (4-foot or longer) for platform leveling
- Jack stands or cribbing for supporting components during assembly
- Rubber mallet for persuading parts into alignment
- Measuring tape and square
- Helper (highly recommended even for four-post)
Materials and Supplies:
- Anchor bolts (usually included with lift, verify before starting)
- Hydraulic fluid (AW-32 typically, verify manufacturer specification)
- White lithium grease for lubrication points
- Threadlocker (blue, medium-strength) for non-torqued bolts
- Concrete cleaner or degreaser
- Shop rags and paper towels
- Masking tape for marking and labeling
- Cable ties for organizing hydraulic lines
Safety Equipment:
- Safety glasses (impact rated, required at all times)
- Work gloves (for handling steel components)
- Steel-toed boots (required when working with heavy equipment)
- Dust mask or respirator (for concrete drilling)
- Ear protection (rotary hammer is loud)
- Hard hat (if working with overhead components)
- First aid kit (accessible and stocked)
💡Professional Tool Rental
Don't own a rotary hammer drill or laser level? Rent them from a tool rental center. A rotary hammer costs $40-$60 per day, a laser level $30-$50 per day. This is far cheaper than buying tools you'll use once, and rental equipment is usually professional-grade.
Consumables to Have on Hand:
- Drill bits (you may break one drilling concrete)
- Mixing sticks (if using any epoxy anchors)
- Disposable gloves (for hydraulic work)
- Plastic sheeting (to protect floors from grease and oil)
- Cardboard or moving blankets (to protect columns during handling)
Documentation:
Keep these accessible during installation:
- Manufacturer's installation manual (read completely before starting)
- Anchor hole template or drilling diagram
- Torque specifications sheet
- Hydraulic system diagram
- Wiring diagram (for electrical connections)
- Local building code requirements
- Permit paperwork
Don't start unpacking until you've verified you have everything on this list. Missing a critical tool halfway through installation will cost you hours or days of delay.
Step 1: Concrete Floor Preparation
The concrete preparation phase is where most installation problems occur. Rushing this step or cutting corners will compromise the entire installation's safety. Take your time and do it right.
1. Clean the installation area thoroughly
Sweep and vacuum the entire floor area where the lift will be installed, extending 2 feet beyond the planned footprint. Remove all dirt, oil, grease, paint, and debris. Use a concrete degreaser on any oily areas and let it dry completely. The floor must be clean and dry before proceeding.
2. Mark the lift position
Using the manufacturer's dimensional drawings, measure and mark the exact position of each column on your floor. Account for:
- Distance from the garage door (typically 3-4 feet minimum for two-post lifts)
- Clearance to side walls (3+ feet for walk-around space)
- Alignment with your garage bay centerline
- Position relative to electrical outlet or planned circuit location
Use chalk lines to mark the column centerlines. Measure diagonally corner-to-corner to verify the layout is square (diagonal measurements should be equal within 1/4 inch).
3. Scan for embedded obstacles
Before drilling any anchor holes, use a rebar locator to scan the entire anchor zone (6 inches around each planned hole). Map the location of any:
- Rebar or wire mesh reinforcement
- Embedded conduit
- Radiant heating tubes
- Post-tension cables (critical to avoid)
If you find obstacles directly under a planned anchor location, you may need to shift the hole position by a few inches. Consult the lift manufacturer before making significant position changes.
4. Lay out the anchor hole template
Most lifts include a paper or cardboard drilling template. Position this template precisely at each column location using the marks you made earlier. Tape it down securely. Double-check all dimensions before marking the concrete.
Use a punch or center punch to mark each anchor hole location through the template. These punch marks will guide your drill bit and prevent it from walking when you start drilling.
5. Drill the anchor holes
⚠️Critical Safety Step
Always wear safety glasses, hearing protection, and a dust mask when drilling concrete. Concrete dust is harmful to breathe and flying chips can cause serious eye injury. Never drill without proper protection.
Using a rotary hammer drill with the correct size masonry bit (5/8" or 3/4" as specified by manufacturer):
- 1Start the drill at a slow speed to establish the hole
- 2Drill straight down (perpendicular to floor) to the specified depth
- 3Measure depth with a tape measure or depth stop on your drill
- 4Typical anchor depth: 4-6 inches (verify manufacturer specification)
- 5Drill 1/4" deeper than the anchor bolt length to allow for concrete dust settlement
6. Clean the anchor holes
This step is critical and often skipped. Dirty anchor holes reduce anchor strength by 50% or more.
- 1Use a wire brush on a drill to scrub the inside of each hole
- 2Vacuum out all concrete dust and debris using a shop vacuum
- 3Blow out remaining dust with compressed air
- 4Repeat vacuum and air blow process twice more
- 5Inspect each hole with a flashlight to verify it's clean
7. Verify hole depth and perpendicularity
Insert a spare anchor bolt (without load) into each hole to verify:
- Bolt goes to full depth without bottoming out
- Bolt stands perpendicular (not angled)
- Bolt can be tightened with a socket without interference
If any holes are not correct, drill them deeper or straighter as needed. Don't proceed with defective anchor holes.
8. Final floor inspection
Before moving to assembly, inspect the concrete around each anchor hole for:
- Cracks radiating from holes (stop and consult engineer if found)
- Spalling or broken edges (enlarge hole if minor, consult engineer if major)
- Moisture (must be completely dry before anchor installation)
Your concrete is now prepared for lift installation. This entire process typically takes 2-4 hours for a two-post lift. Don't rush it.
Step 2: Electrical Setup
Electrical work for a car lift must be performed by a licensed electrician in most jurisdictions. Even if you're comfortable with electrical work, check your local codes. Many areas specifically require licensed contractors for 220V circuits. This section explains what needs to happen so you can oversee the work or understand what your electrician is doing.
Circuit Requirements:
- Voltage: 220V single-phase (also called 240V)
- Amperage: 20-30 amps (check lift specifications)
- Breaker: Double-pole 20A or 30A depending on load
- Wire gauge: 10 AWG for 30A circuits up to 50 feet, 8 AWG for longer runs
- Ground: Required, typically 10 AWG copper
- Conduit: Required by code in many areas for exposed wiring
Installation Steps (Performed by Licensed Electrician):
1. Install the circuit breaker
A new double-pole breaker (takes up two adjacent slots) is installed in your main panel or sub-panel. The electrician will verify:
- Panel has adequate capacity for additional load
- Breakers are compatible with panel brand
- Panel bus bars are not overloaded
- Proper torque on breaker connections
2. Run the circuit wiring
From the panel to the lift location, following the most direct route that complies with code:
- Through attic/crawl space if accessible
- Along walls in conduit if exposed
- Proper support every 4-6 feet
- Protection from physical damage
- Appropriate bend radius on corners
- Proper wire stripping and connections
3. Install the disconnect switch
Required by National Electrical Code for motor-driven equipment. The disconnect must be:
- Within sight of the lift motor
- Clearly labeled as the lift disconnect
- Lockable in the open (off) position
- Rated for the circuit amperage
- Mounted at accessible height (48-60 inches typically)
4. Install the outlet or direct connection
Depending on lift design, either:
- Outlet method: NEMA 6-20R or 6-30R outlet (no ground pin, as ground is separate)
- Hardwire method: Direct connection into a junction box on the lift
- GFCI protection if required by local code (verify motor-rated GFCI to avoid nuisance tripping)
5. Verify proper grounding
The lift must be properly grounded to prevent electrical shock:
- Ground wire from panel to lift
- Ground connection to lift frame or chassis
- Bonding between lift components if multiple sections
- Ground rod installation if required by code
- Continuity testing to verify ground path
ℹ️Voltage Drop Considerations
For circuit runs longer than 50 feet, voltage drop becomes significant. Under-voltage causes motors to overheat, draw excessive current, and fail prematurely. Calculate voltage drop using online calculators or consult your electrician. Upsizing wire gauge (10 AWG to 8 AWG) prevents this issue.
6. Testing and verification
Before connecting the lift, the electrician should:
- Test voltage at the outlet or connection point (should read 220-240V)
- Verify correct polarity
- Test ground continuity
- Check that breaker trips properly under load
- Provide documentation of the installation
Typical Costs:
- Basic electrical installation (panel has capacity, short run): $300-$500
- Moderate installation (longer wire run, conduit required): $500-$800
- Complex installation (sub-panel needed, long run): $800-$1,500
DIY Considerations:
If you're qualified and local code allows owner installation:
- Pull permits and schedule inspections
- Use proper wire gauge and breaker size (don't undersize)
- Follow NEC (National Electrical Code) requirements
- Use proper connectors and junction boxes
- Label everything clearly
- Have work inspected before connecting lift
When Electrical is Complete:
Do NOT connect the lift yet. Leave it disconnected until after mechanical assembly and initial testing are complete. This prevents accidental operation during installation.
Step 3: Column and Component Assembly
Now we move to the physical assembly of the lift. This is the most labor-intensive part of the installation and where having professional help is most valuable. Two-post lift columns weigh 300-500 pounds each and require careful handling.
Two-Post Lift Assembly Sequence:
1. Unpack and inventory all components
Before you start, verify you have everything:
- Two columns (left and right, usually marked)
- Overhead beam or baseplate (depending on lift design)
- Four swing arms with mounting hardware
- Hydraulic power unit
- Hydraulic hoses or equalization cables
- All mounting hardware separated by type
- Safety locks and mechanisms
- Installation manual and hardware list
Missing parts? Stop and contact the manufacturer immediately. Don't improvise or substitute hardware.
2. Position columns near anchor holes
Using an engine hoist, forklift, or three strong people:
- 1Carefully move each column to its installation position
- 2Orient the column correctly (front/back, left/right)
- 3Place cardboard or moving blankets under columns to protect floor
- 4Do NOT install anchor bolts yet
3. Install overhead beam or connect baseplate
For overhead beam designs:
- Lift beam into position on top of columns (requires hoist or lift)
- Align bolt holes
- Insert bolts finger-tight
- Do NOT fully tighten yet
For baseplate designs:
- Connect plates between column bases
- Align and insert connecting bolts
- Leave slightly loose for alignment adjustments
4. Stand columns upright
This is the most dangerous step. With columns connected:
- Use hoist or multiple people to carefully raise columns to vertical
- Have helper guide columns and prevent tipping
- Temporarily brace columns with 2x4s or support stands
- Columns are unstable until anchored—never leave unattended
5. Rough position over anchor holes
With columns vertical but not anchored:
- Slide assembly to align column base holes with drilled anchor holes
- Use pry bars or small jacks to fine-tune position
- Verify all four anchor holes per column align perfectly
- Check that columns are oriented correctly (lift control side, arm position)
6. Verify plumb and level
Using a laser level or long bubble level:
- Check that each column is perfectly plumb (vertical)
- Check that overhead beam is level side-to-side
- Check that columns are parallel to each other
- Adjust shimming if needed under column bases
7. Install anchor bolts
⚠️Critical Safety Step
Anchor bolts must be torqued to the manufacturer's specification (typically 90-150 ft-lbs). Under-torquing reduces holding power by 50% or more. Over-torquing can crack the concrete or break the bolt. Always use a calibrated torque wrench.
For each anchor location:
- 1Insert wedge anchor through column base and into concrete hole
- 2Ensure anchor goes to full depth (should be snug but not tight)
- 3Using a torque wrench, tighten anchor to specification in cross-pattern
- 4Re-check torque on all anchors after tightening all of them
- 5Mark each anchor with paint or marker to indicate proper torque
8. Tighten all structural bolts
Now that columns are anchored:
- Tighten all overhead beam or baseplate connection bolts
- Follow manufacturer's torque specifications
- Use threadlocker on bolts specified in manual
- Double-check all connections
9. Install swing arms
Each arm assembly:
- Slide carriage onto column rail or install in guide system
- Install arm pivot pins or mounting bolts
- Attach arm restraint pins or safety locks
- Ensure arms move freely through full range
- Install arm pads or adapters
- Lubricate all pivot points with white lithium grease
10. Install hydraulic system
- Mount hydraulic power unit on designated column
- Route hydraulic hoses between columns and to arms
- Connect all hydraulic fittings hand-tight, then snug with wrench
- Install equalization cables or synchronization system
- Check that all connections are secure with no cross-threading
- Do NOT fill hydraulic fluid yet
Four-Post Lift Assembly (Simplified):
Four-post lifts assemble more like furniture:
- 1Lay out all components and hardware
- 2Assemble runway frames on the ground
- 3Attach vertical columns to runways
- 4Install cross braces and structural supports
- 5Bolt columns to bases
- 6Install hydraulic system (pre-mounted on most models)
- 7Add approach ramps and accessories
- 8Level entire assembly using adjustable feet
- 9No floor anchoring typically required
Four-post assembly usually takes 3-5 hours with two people following the manual.
Step 4: Alignment, Hydraulic Fill, and Calibration
With the lift mechanically assembled, we now move to the precision work of alignment, hydraulic system preparation, and functional calibration. This phase ensures your lift operates smoothly and safely.
Hydraulic System Preparation:
1. Fill hydraulic reservoir
Using the hydraulic fluid specified by manufacturer (typically AW-32):
- Locate the reservoir fill port (usually on top of power unit)
- Pour fluid slowly through clean funnel with fine mesh filter
- Fill to the level marked on sight glass or dipstick
- Do NOT overfill (causes pressure problems)
- Typical reservoir capacity: 3-5 gallons
- Use only fresh, clean hydraulic fluid from sealed containers
2. Bleed air from hydraulic system
Air in the system causes erratic operation and must be removed:
- 1With lift fully lowered, locate bleed valves on cylinders and pump
- 2Open bleed valve 1/2 turn
- 3Run pump briefly (5-10 seconds) to push air out bleed port
- 4Close bleed valve when fluid flows steadily without bubbles
- 5Repeat for each cylinder and high point in the system
- 6Check reservoir level and top off as needed
- 7May need to repeat process 2-3 times to remove all air
3. Check all hydraulic connections for leaks
With system filled and bled:
- Raise lift slowly to mid-height position
- Inspect every hose connection, fitting, and cylinder seal
- Look for seeping fluid or drips
- Tighten any connections that show leaks
- Clean up any spilled fluid immediately (slippery and messy)
Alignment and Synchronization:
For two-post lifts:
1. Verify column plumb
- Use laser level to confirm both columns are perfectly vertical
- Check plumb in both front-to-back and side-to-side directions
- Any deviation more than 1/4 inch per 10 feet requires adjustment
- May need to shim under column bases
2. Test synchronization
- Raise lift to several intermediate positions
- Measure height of left and right arms at each position
- Arms should be within 1/4 inch of each other at all heights
- If not synchronized, check equalization cable tension or hydraulic balance
3. Adjust equalization system
Depending on lift design:
- Cable systems: Adjust cable tension at equalizer pulley
- Hydraulic systems: Adjust flow restrictors or balance valves
- Follow manufacturer's specific procedure
- May require several adjustments to achieve perfect sync
For four-post lifts:
1. Level the platform
- Place a 4-foot level across runway in multiple positions
- Adjust corner leveling feet until platform is perfectly level
- Check diagonal levelness as well
- Platform should be level within 1/8 inch over entire length
2. Verify four-point synchronization
- Raise platform to mid-height
- Measure height at all four corners
- All corners should be within 1/2 inch of each other
- If not, check cable tensions or hydraulic balance
- Adjust per manufacturer's instructions
Safety Lock Testing:
1. Test lock engagement
- Raise lift to each lock position (typically every 3-4 inches)
- Lower lift slowly until it settles onto locks
- Verify solid engagement with no bouncing or slipping
- Check that lock pawls or pins are fully seated in notches
- Test at minimum 5 different height positions
2. Test lock release mechanism
- Verify that locks don't release until lift is raised slightly
- Confirm lock release control requires sustained pressure
- Test emergency lock release if equipped
- Ensure locks re-engage automatically when control is released
3. Load test safety locks (without vehicle)
- Place test weight on lift (sandbags, concrete blocks, or heavy equipment)
- Raise to mid-height and settle onto locks
- Release all hydraulic pressure
- Verify locks hold weight securely with no movement
- If available, test with 50% of rated capacity for ultimate confidence
Operational Calibration:
1. Set lift speed
Some lifts have adjustable lift/lower speed:
- Adjust hydraulic flow controls if needed
- Typical rise time: 45-90 seconds from floor to full height
- Typical lower time: 30-60 seconds from full height to floor
- Slower is safer, faster is more convenient—balance accordingly
2. Test all controls
- Up button/switch: Smooth raising with no hesitation
- Down button/switch: Controlled lowering
- Lock release: Functions correctly at all positions
- Emergency stop: Immediately halts all motion
- Reset emergency stop and verify normal operation resumes
3. Lubricate all moving parts
Apply white lithium grease to:
- Arm pivot points
- Carriage slides or rollers
- Lock mechanisms
- Safety pawls
- All grease fittings (if equipped)
Documentation:
Record all measurements and settings:
- Anchor bolt torque values and date
- Hydraulic fluid type and quantity
- Synchronization measurements
- Lock engagement test results
- Any adjustments made
- Date of installation and installer names
Keep this documentation with your lift manual for future reference and maintenance.
Step 5: First Use and Comprehensive Safety Testing
Before you lift your first vehicle, conduct comprehensive safety testing to verify every system works correctly. This is not optional. A properly tested lift is safe; an untested lift is a potential hazard.
Pre-First-Use Safety Checklist:
Visual Inspection (No Load):
- [ ] All anchor bolts torqued and marked
- [ ] All structural bolts tight
- [ ] No visible damage to columns, beams, or arms
- [ ] All hydraulic connections tight, no leaks
- [ ] Hydraulic fluid at proper level
- [ ] All safety locks present and functioning
- [ ] Arms move freely without binding
- [ ] Power cable and electrical connections secure
- [ ] Disconnect switch accessible and functioning
- [ ] No tools or debris on lift or in mechanism
- [ ] Work area clear and well-lit
Operational Testing (No Vehicle):
1. Power-up sequence
- Turn on disconnect switch
- Verify control panel indicators light up
- Press up control briefly—lift should begin rising
- Press down control—lift should stop and begin lowering
- Test emergency stop—all motion should cease immediately
2. Full-range cycle test
- From fully lowered position, raise lift to maximum height
- Listen for unusual sounds (grinding, squealing, banging)
- Watch for smooth motion with no jerking or hesitation
- Verify synchronization at multiple heights
- Lower lift completely and repeat cycle 3 times
3. Safety lock function test
- Raise lift to each lock position sequentially
- At each position, release hydraulic pressure and verify locks engage
- Attempt to push arms down—should have zero movement
- Raise slightly, release locks, lower to next position
- Test all lock positions on both sides
First Vehicle Lift (Test Protocol):
⚠️Start with a Light Vehicle
For your first lift, use the lightest vehicle available (ideally 50% of rated capacity or less). A small sedan or coupe is perfect. Save your heavy truck for after you've verified everything works perfectly with lighter loads.
1. Vehicle positioning
For two-post lifts:
- Position vehicle between columns
- Center vehicle front-to-back based on center of gravity
- Consult vehicle lift point diagram (usually in owner's manual or online)
- Place arm pads precisely on designated lift points
- Double-check pad placement before raising
For four-post lifts:
- Align vehicle with center of ramps
- Drive vehicle slowly onto ramps
- Center vehicle with equal tire overhang on each side
- Chock rear wheels before lifting
- Verify parking brake is engaged
2. Test lift sequence
1. Raise 6 inches off ground and stop - Check that vehicle is stable and not shifting - Verify all arms or ramps are properly supporting vehicle - Look for any binding or unusual sounds - If everything looks good, proceed
2. Raise to mid-height (3-4 feet) and stop - Let vehicle settle onto safety locks - Walk around entire vehicle checking stability - Gently push on bumpers—vehicle should not rock or shift - Inspect arms or ramps for proper contact - Check that columns are not tilting or flexing
3. Raise to comfortable working height and lock - Settle onto locks and release hydraulic pressure - Wait 5 minutes while observing for any movement - Perform gentle shake test on vehicle - Inspect all lock engagement points
4. Lower vehicle in stages - Raise slightly to release locks - Lower 2 feet and stop - Lower another 2 feet and stop - Lower to 6 inches and stop - Lower completely to ground
3. Post-lift inspection
- Check all anchor bolts for tightness (can loosen during first lift)
- Inspect hydraulic connections for weeping
- Look for any structural deflection or damage
- Verify no fluid leaks
- Confirm safety locks returned to rest position
Documentation for First Lift:
Record the details:
- Vehicle make, model, approximate weight
- Date and time of first lift
- Maximum height reached
- Any issues or anomalies observed
- Confirmation that all safety systems functioned correctly
Repeat Testing Over First Week:
- Perform at least 5 full-cycle lifts over the first few days
- Gradually increase vehicle weight toward rated capacity
- Re-torque all anchor bolts after first 10 lifts
- Check hydraulic fluid level after first week
- Verify synchronization remains accurate
When to Call for Professional Inspection:
Stop using lift immediately and call a qualified technician if you notice:
- Anchor bolts loosening
- Hydraulic leaks of any size
- Columns tilting or deflecting
- Arms out of synchronization by more than 1/2 inch
- Safety locks failing to engage
- Unusual sounds (grinding, popping, squealing)
- Erratic lifting or lowering
- Vehicle shifting or instability
- Any structural cracking or damage
Don't take chances. If something doesn't look or sound right, get professional help before someone gets hurt.
Our Top Recommendations
BendPak XPR-10AS
Best two-post lift for serious home installations. Comes with detailed installation manual, precise drilling template, and excellent manufacturer support. The asymmetric design provides outstanding vehicle access, and the 10,000-pound capacity handles nearly any vehicle. ALI-certified for safety assurance.
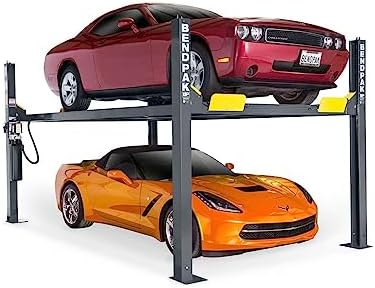
BendPak HD-9
Excellent four-post option for DIY installation. The freestanding design requires no floor anchoring, making installation much simpler than two-post lifts. Clear assembly instructions and pre-mounted hydraulic system make this a good choice for capable DIYers. 9,000-pound capacity handles most vehicles.

QuickJack 5000TL
Perfect for owner installation with zero professional help needed. Ships complete and ready to use—just unbox, position under your vehicle, and plug into 110V outlet. Setup takes under 30 minutes for first-time users. No concrete drilling, no electrical work, no permits required. Ideal for DIYers who want to avoid the complexity of traditional lift installation.
* Affiliate link - we may earn a commission
Frequently Asked Questions
Can I install a car lift myself or do I need professionals?▼
How long does car lift installation take?▼
Do I need a permit to install a car lift?▼
What is the hardest part of installing a car lift?▼
How do I know if my concrete is strong enough?▼
Related Expert Reviews
More Buying Guides
How to Choose the Right Car Lift for Your Garage
Choosing the right car lift is one of the biggest investments you can make for your home garage. This comprehensive guide walks you through every factor you need to consider, from ceiling height and floor thickness to weight capacity and electrical requirements.
12 min read · By James WilsonComparison2-Post vs 4-Post Car Lifts: Which is Right for You?
The debate between two-post and four-post car lifts is the most common question I hear from garage owners. Both have distinct advantages and trade-offs, and the right choice depends entirely on how you plan to use the lift.
10 min read · By Sarah ChenSafetyCar Lift Safety Features You Cannot Ignore
A car lift holds thousands of pounds directly above you while you work. Understanding the safety features that protect you is not optional. This guide covers every critical safety system you should demand in a car lift purchase.
11 min read · By Mike RodriguezReady to Find Your Lift?
Browse our curated selection of top-rated car lifts or use our comparison tool to find the perfect match.